INTENTIVE shortens B2B sales cycles and simplifies life for both marketing and sales professionals. By delivering unparalleled business insights via buyer-level intent signals and behaviors, INTENTIVE truly accelerates sales outcomes.
But none of this matters unless you’re able to actually get your hands on the buyer-level intent insights the platform offers.
Using INTENTIVE’s Buyer-Level Insights
The information INTENTIVE records, aggregates, and presents to users is some of the most actionable across the B2B world.
So how can these insights be put into action?
Installing the INTENTIVE Insights Salesforce App
We’re excited to share that we’ve built a fully loaded Salesforce app that’s ready to export buyer-level intent insights directly into your Salesforce environment.
Here are the step-by-step instructions for installing the INTENTIVE Insights app and connecting it to your Salesforce instance.
1. Install the Managed Package
According to Salesforce’s Help site, a managed package is a “container that includes the components of a Salesforce application, and it’s a mechanism for installing apps in Salesforce orgs.”
In this case, the managed package will be NetLine’s INTENTIVE Insights app.
To install the NetLine INTENTIVE Insights managed package for Salesforce, use the links below:
Production Salesforce Orgs
Sandbox Salesforce Orgs
Invite your teammates
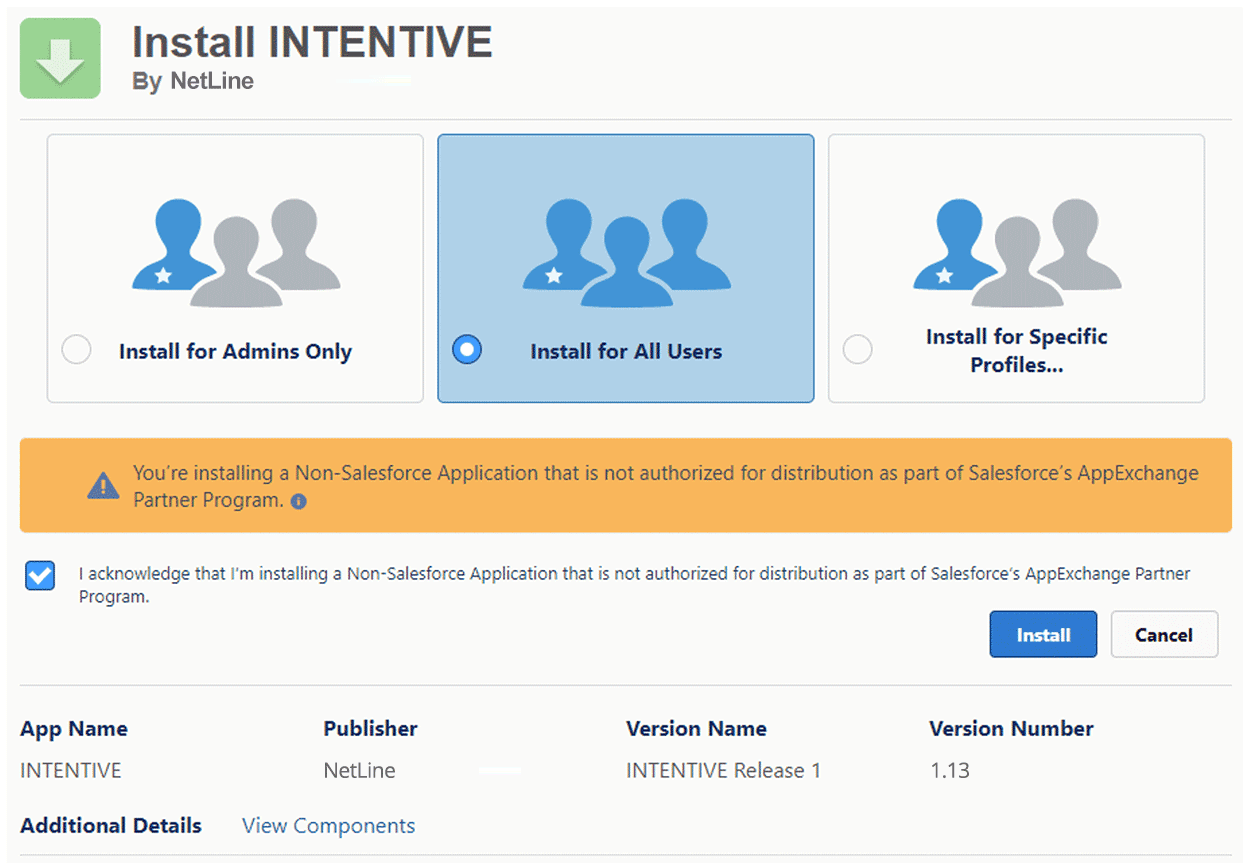
Choose which users you will give access to INTENTIVE Insights. Depending on your access requirements, these access levels are:
- Admins Only
- All Users
- Specific Profiles
We recommend selecting All Users or Specific Profiles, as access to the INTENTIVE Insights component will be further controlled by a Salesforce permission set.
Agree to the acknowledgment box and click the Install button. Note that this may take a few minutes.
2. Deploy and Authorize the INTENTIVE Insights app
Once the installation is complete, you’ll complete the following steps to deploy the app and enable authorization with the INTENTIVE platform.
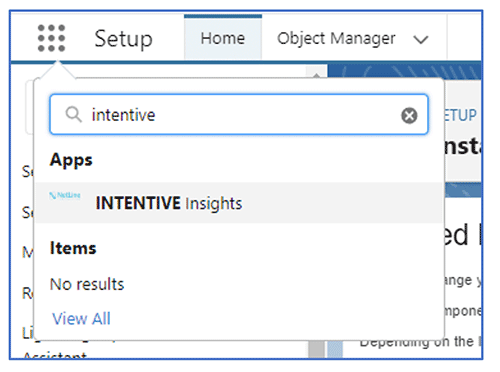
- Go to the App Launcher (which can be found at the top left-hand corner) and search for “INTENTIVE Insights”. Open the INTENTIVE Insights app.
- Next, click Complete Setup. This will deploy the app to your Salesforce org.
- Go to Setup > App Manager. On the INTENTIVE Connected App row, select the dropdown arrow at the right side of the screen and click on View.


- Click on Manage Consumer Details and copy the Consumer Key and Secret from Salesforce to the INTENTIVE platform.
- Before your Consumer Key and Secret are displayed, you may be prompted for a verification code.
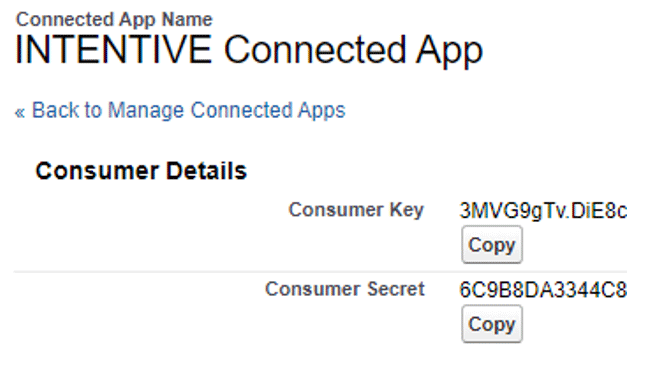
- Input your Consumer Key, Consumer Secret, and Salesforce Organization ID in the text fields found on the Salesforce Connector page inside the NetLine Portal.
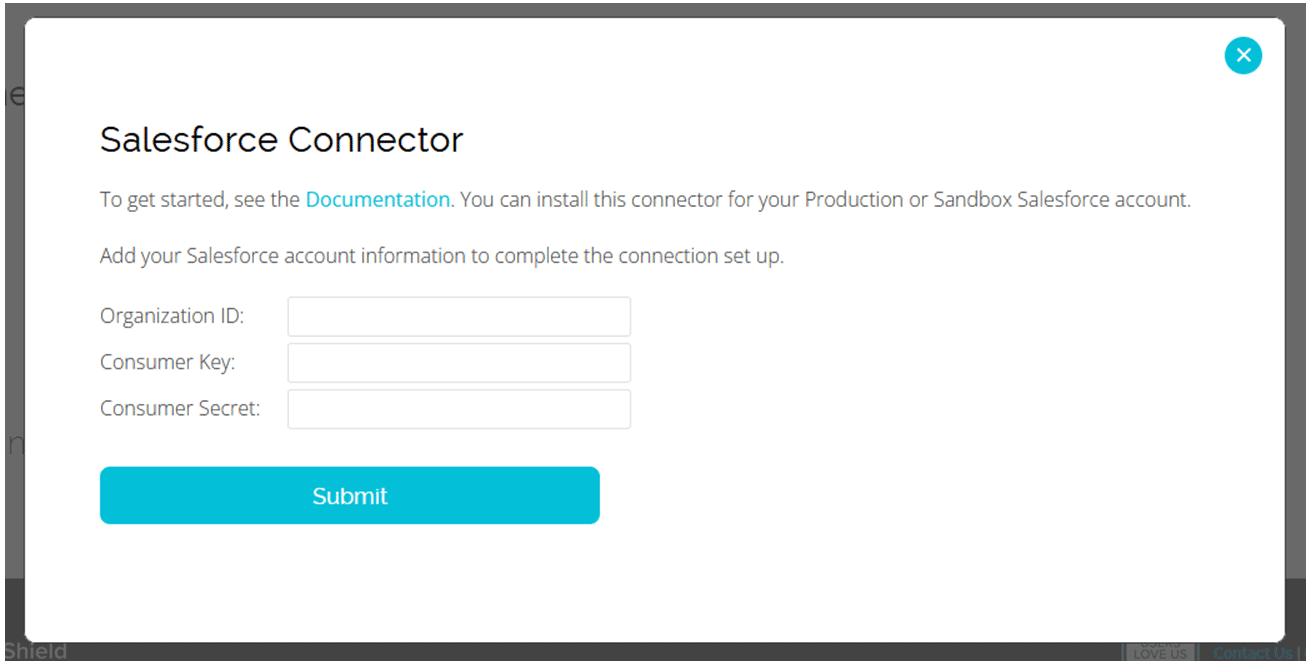
*Note that you can always retrieve these details from your Salesforce Setup Administration. If you need to do so, you can find each setup below:
- Consumer Key and Secret:
- Setup > App Manager > INTENTIVE Connected App > View > Manage Consumer Details
- Organization ID:
- Setup > Company Information > Salesforce.com Organization ID
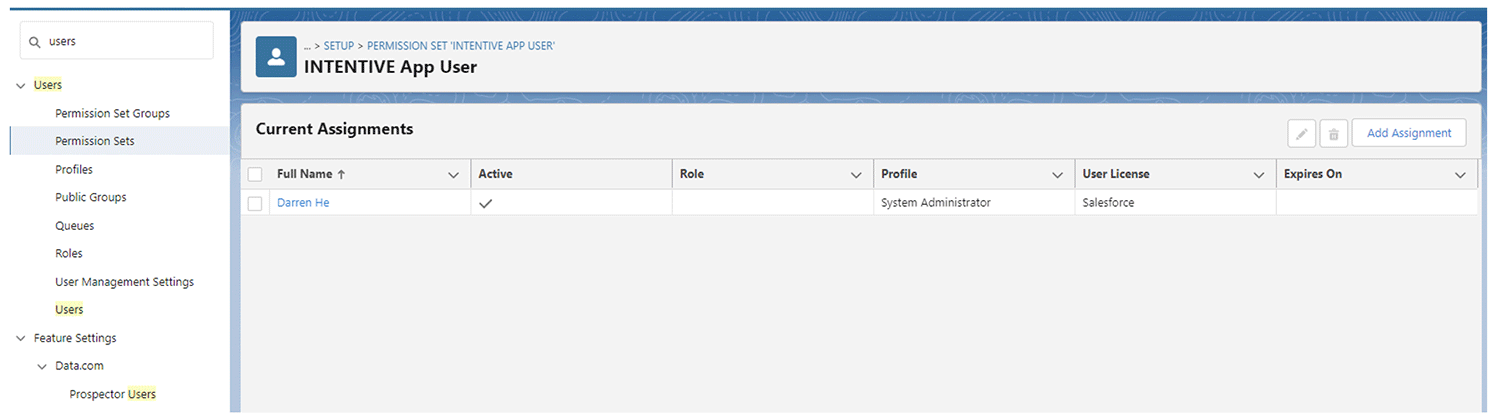
3. Add “INTENTIVE App User” Permission Set to Users
- Within Salesforce Setup > Users > Users, click on the names of each User that needs access to the INTENTIVE Insights app.
- Enable the “INTENTIVE App User” Permission Set for each User.
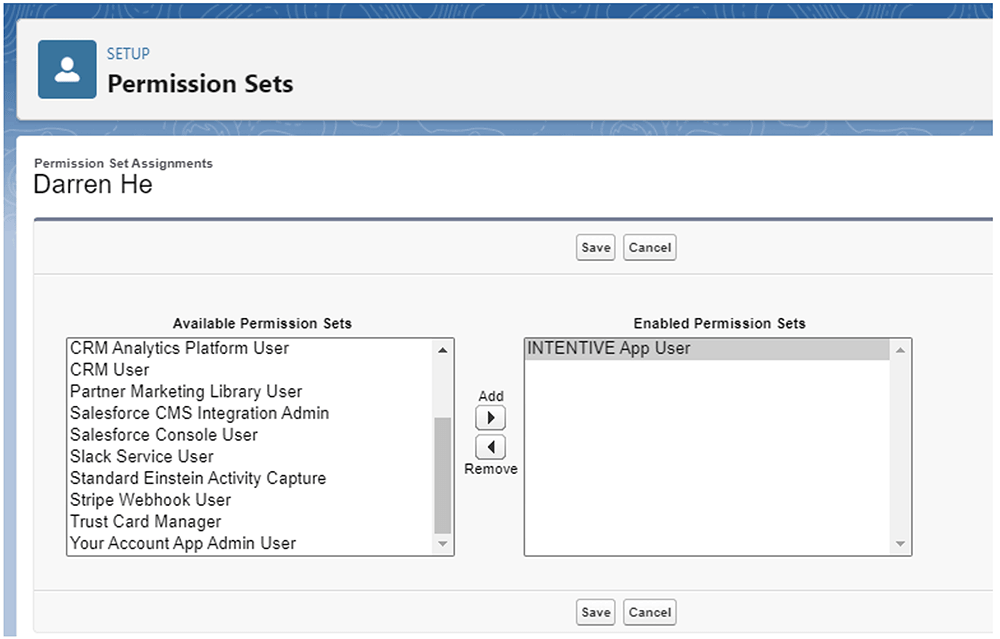
Alternatively, you can open Setup > Users > Permission Sets, and click Management Assignments > Add Assignments to assign the Permission Set in bulk.
For more information about assigning Permission Sets, please see the Assign Permission Set to Users Salesforce Documentation.
4. Add the INTENTIVE Insights component to a Lightning Page Account Record Page layout.
- From an existing Accounts Lightning page, click the gear icon and select Edit Page.
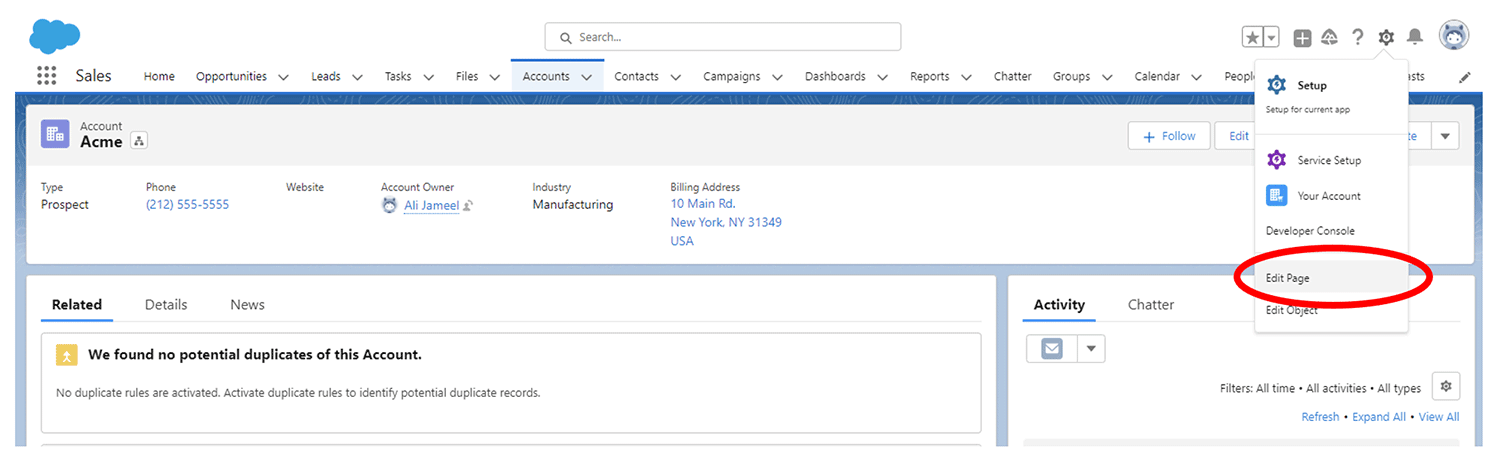
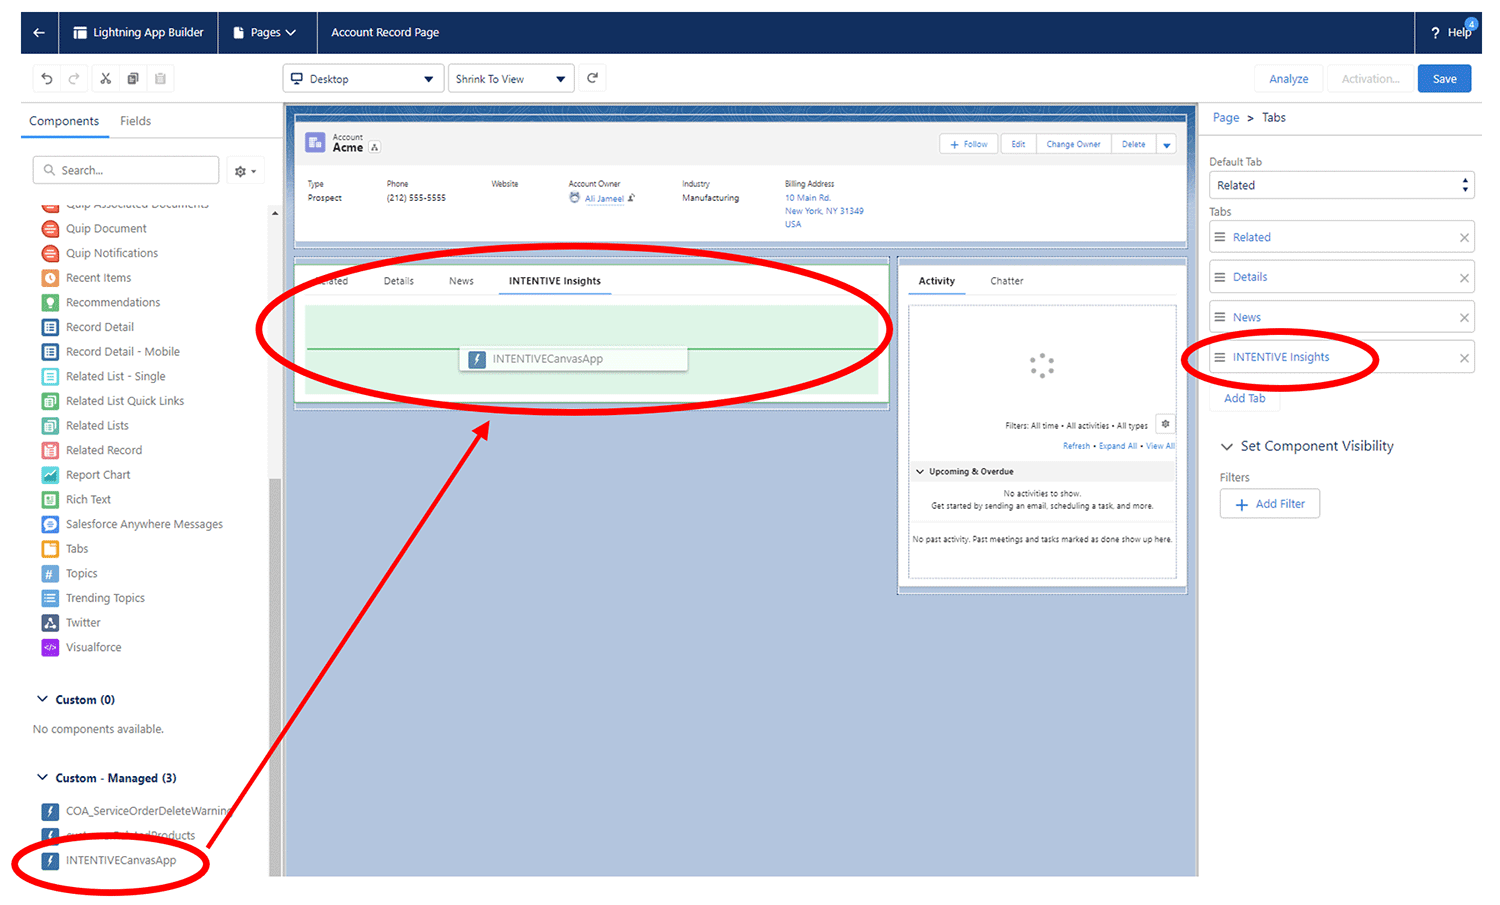
- At the bottom of the left sidebar, there will be a component in the Custom – Managed section called “INTENTIVECanvasApp”.
- Add this to the location on the Account Lightning Record Page where you would like the component to be displayed.
- For example, you could add a tab called “INTENTIVE Insights” and add the component there, as shown in the screenshots below. Save and Activate on specific app(s) as needed.
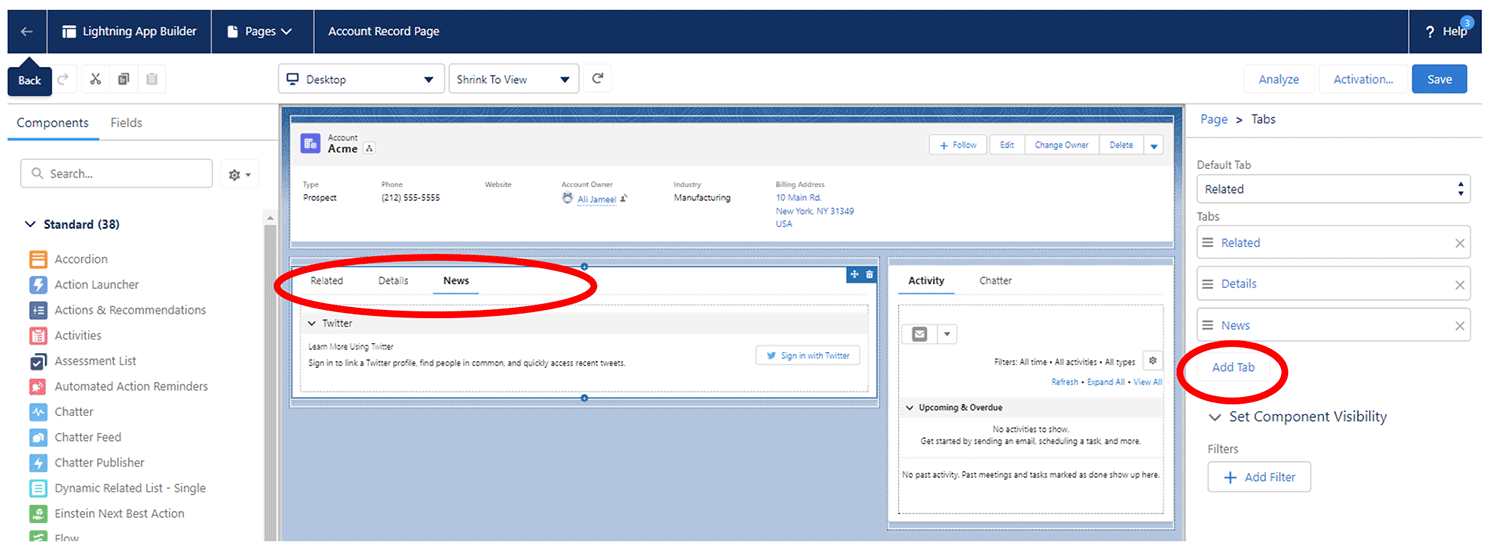
- Add a Tab by clicking on the component with Tabs.
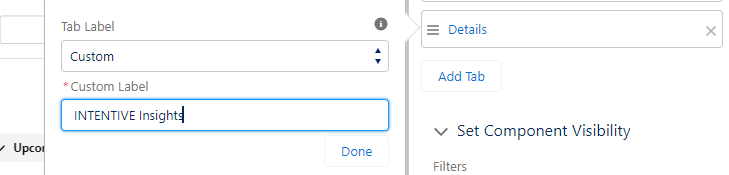
- Then in the right-hand column, click Add Tab. Customize the tab name by clicking it in the properties pane, click Custom, and enter the name “INTENTIVE Insights“.
For more information on adding and customizing tabs on Lightning Pages please see the Salesforce Documentation.
INTENTIVE and Salesforce Lightning
Additionally, we know that many Salesforce users prefer Salesforce Classic to Lightning. It’s important to note, however, that INTENTIVE Insights will only work with Salesforce Lightning.
Note that the INTENTIVE Insights component must be deployed on an Account Lightning Record Page, as it provides the insights for the Account context that it is deployed on.
Connecting INTENTIVE to Salesforce is Simple
But that’s just our opinion, of course. We know that things can go array at times, so if you get stuck, send a note to portal-support@netline.com—we’ll help get you unstuck and on your way in no time.
We’re excited to help you get the most of out NetLine INTENTIVE!